Тестирование при помощи снимков
Тестирование с использованием снимков это очень полезный инструмент в ситуациях где вы хотите быть уверены, что ваш пользовательский интерфейс не изменяется неожиданным образом.
Типичный тест с использованием снимков сначала рендерит ваш UI-компонент, создает снимок на основе рендера, затем сранивает его с эталонным снимком, который хранится вместе с тестом. Т�ест считается проваленным, если снимки не совпадают: либо измнение непредвиденно, либо снимок нуждается в обновлении до акутальной версии UI-компонента.
Тестирование с использованием снимков в Jest
Похожий подход может быть использован, когда дело доходит до тестирования React компонентов. Вместо отображения графического пользовательского интерфейса, что потребует сборки всего приложения, разработчик может использовать специализированный модуль для генерации сериализуемого значения для конкретного React дерева. Consider this example test for a Link component:
import renderer from 'react-test-renderer';
import Link from '../Link';

it('renders correctly', () => {
  const tree = renderer
    .create(<Link page="http://www.facebook.com">Facebook</Link>)
    .toJSON();
  expect(tree).toMatchSnapshot();
});
The first time this test is run, Jest creates a snapshot file that looks like this:
exports[`отображается корректно 1`] = `
<a
  className="normal"
  href="http://www.facebook.com"
  onMouseEnter={[Function]}
  onMouseLeave={[Function]}
>
  Facebook
</a>
`;
Данный артефакт снимка следует занести в систему контроля версий наряду с изменениями в коде как часть вашего процесса по ревью кода. Jest uses pretty-format to make snapshots human-readable during code review. При последующих запусках теста, Jest будет сравнивать сгенерированный вывод с предыдущим артефактом снимка. Если они совпадают, то тест успешно завершится. Если они не совпадают или программа для запуска тестов находит ошибку в вашем коде (в данном случае компонент <Link>), которые следует исправить, или реализация была изменена и артефакт снимка нуждае�тся в обновлении.
The snapshot is directly scoped to the data you render – in our example the <Link> component with page prop passed to it. This implies that even if any other file has missing props (say, App.js) in the <Link> component, it will still pass the test as the test doesn't know the usage of <Link> component and it's scoped only to the Link.js. Also, rendering the same component with different props in other snapshot tests will not affect the first one, as the tests don't know about each other.
Более подробную информацию о том как тестирование с использованием сним�ков работает и почему мы ее реализовали можно найти в данной записи нашего блога. Ме рекомендуем ознакомиться со следующей записью, чтобы получить хорошее представление о том, когда использовать тестирование с использованием снимков. We also recommend watching this egghead video on Snapshot Testing with Jest.
Обновление снимков
Если был введен баг, то довольно просто обнаружить тест со снимком, который проваливается. Когда такое происходит, устраните проблему и убедитесь, что ваши тесты завершаются успешно. А теперь давайте поговорим о случае, когда тест проваливается по причине осознанных изменений в реализации.
Подобная ситуация може возникнуть если мы намеренно внесем изменения в адрес ссылки внутри компонента Link в нашем примере.
// Updated test case with a Link to a different address
it('renders correctly', () => {
  const tree = renderer
    .create(<Link page="http://www.instagram.com">Instagram</Link>)
    .toJSON();
  expect(tree).toMatchSnapshot();
});
В этом случае Jest выведет следующее сообщение:
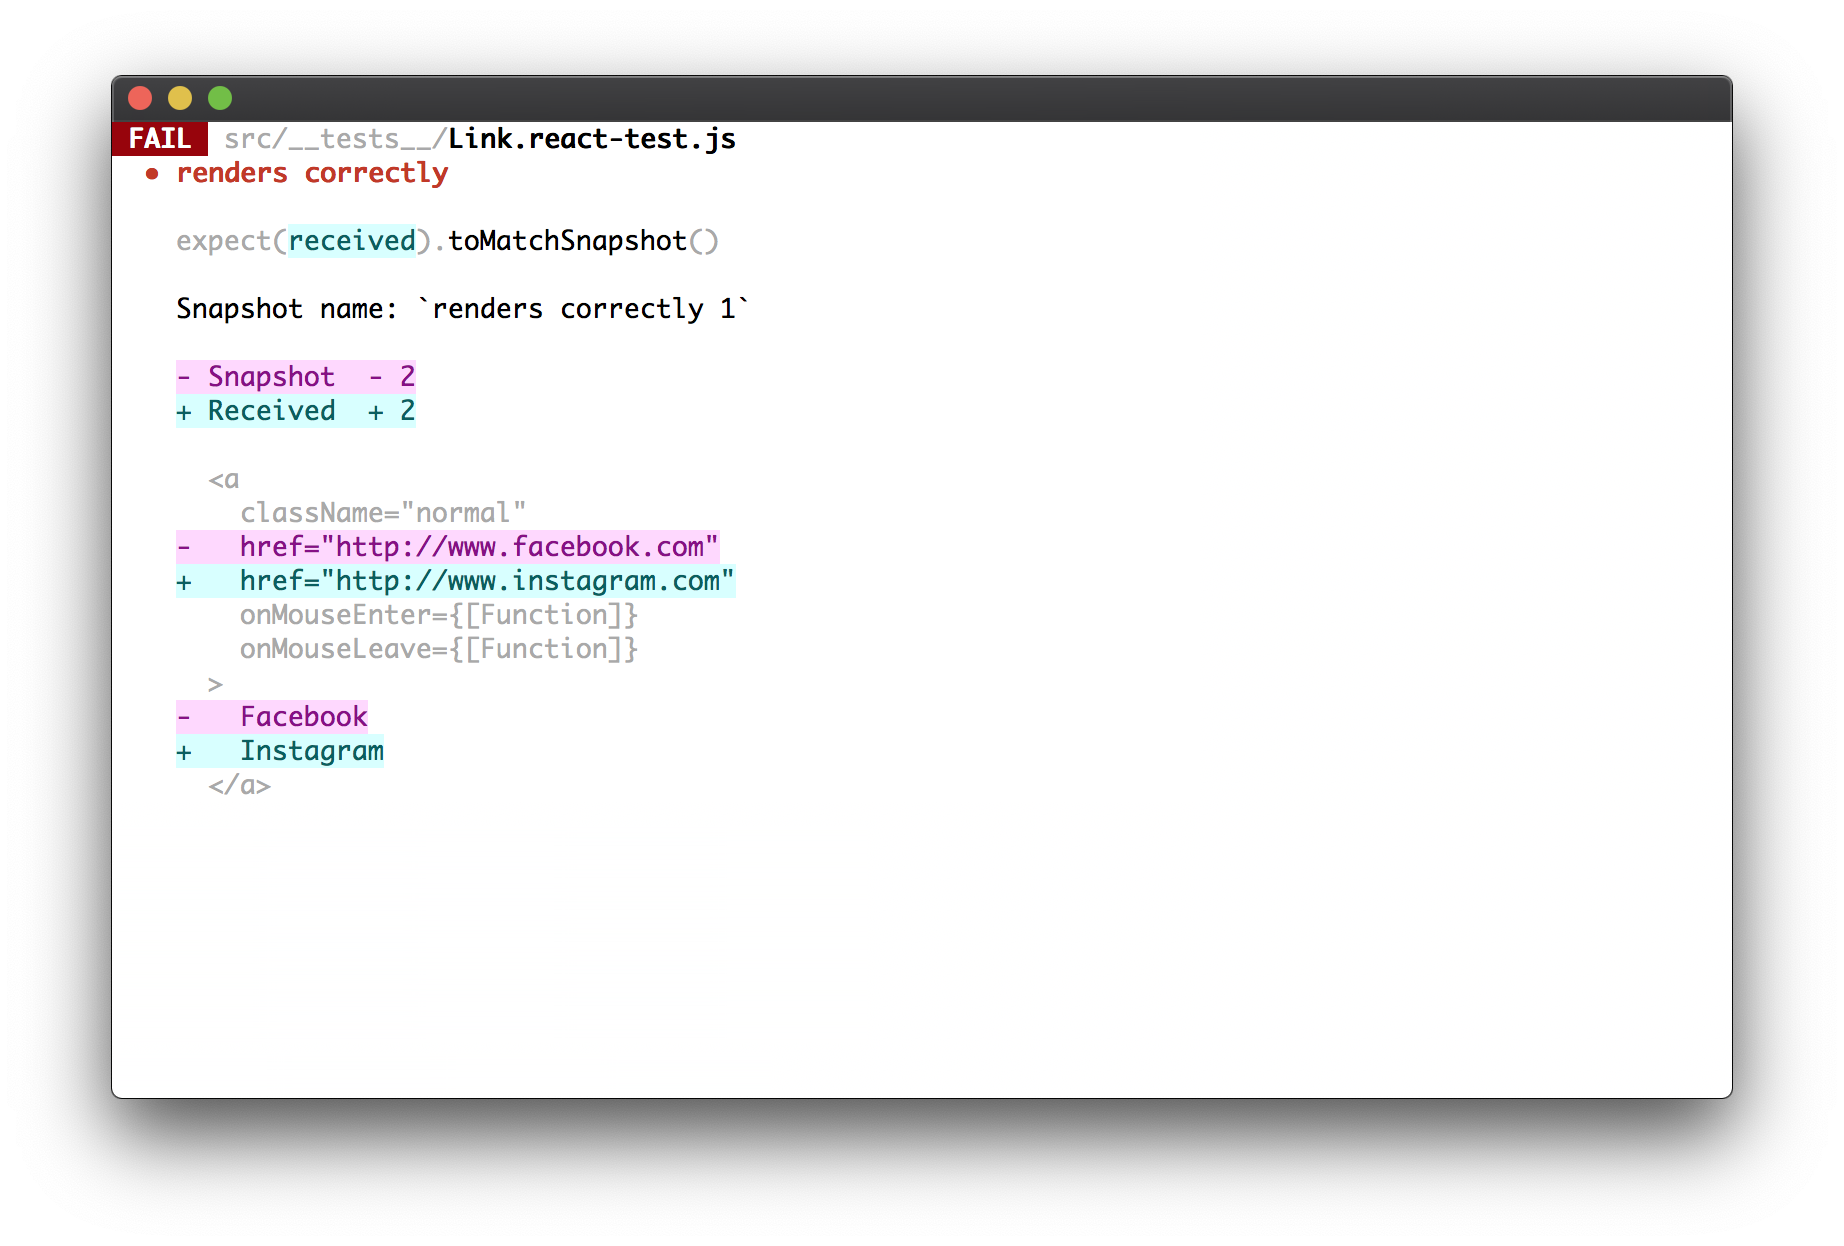
Так как мы только что изменили наш компонент так, чтобы он указывал на другой адрес, то разумно ожидать изменений в снимке этого компонента. Наш тест с использованием снимка проваливается потому, что текущий снимок более не совпадает с сохраненным.
Чтобы решить эту проблему, нам нужно будет обновить сохраненный снимок. Вы можете запустить Jest с флагом, который укажет на необходимость повторной генерации снимков:
jest --updateSnapshot
Не ждите и примените внесенные изменения, выполнив команду указанную выше. Вы также можете использовать эквивалентный односимвольный флаг -u для повторного создания снимков, если предпочитаете. Это создаст и сохранит новый снимок для всех проваливающихся тестов использующих снимки. Если бы существовали дополнительные проваливающиеся тесты ввиду непреднамеренных неполадок, нам бы понадобилось исправить неполадки перед обновлением снимков, чтобы избежать сохранения снимков с неполадками в поведении.
Если вы хотите ограничить то, какие снимки будут сохранены заново, вы можете указать дополнительный флаг --testNamePatter для сохранения снимков лишь для тех тестов, которые совпадают с указанным шаблоном.
You can try out this functionality by cloning the snapshot example, modifying the Link component, and running Jest.
Interactive Snapshot Mode
Failed snapshots can also be updated interactively in watch mode:
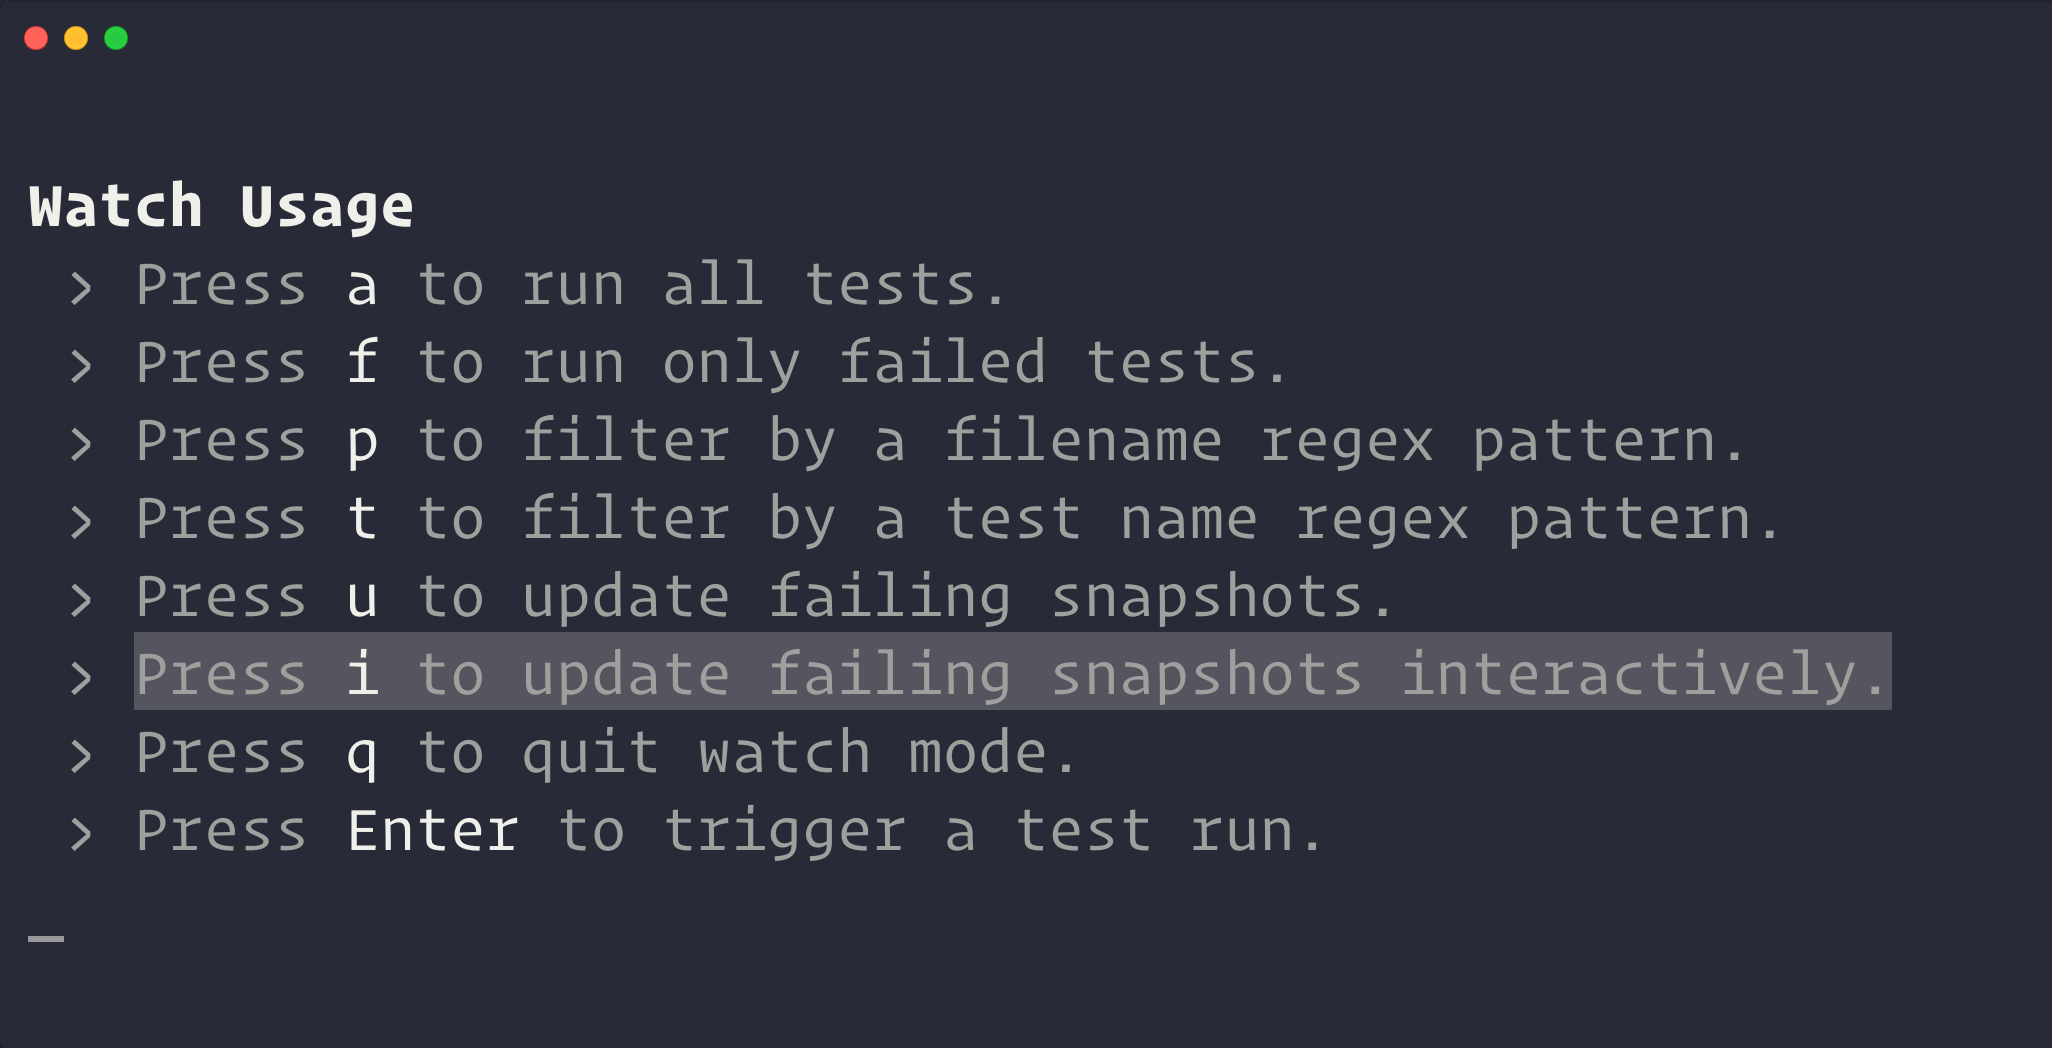
Once you enter Interactive Snapshot Mode, Jest will step you through the failed snapshots one test at a time and give you the opportunity to review the failed output.
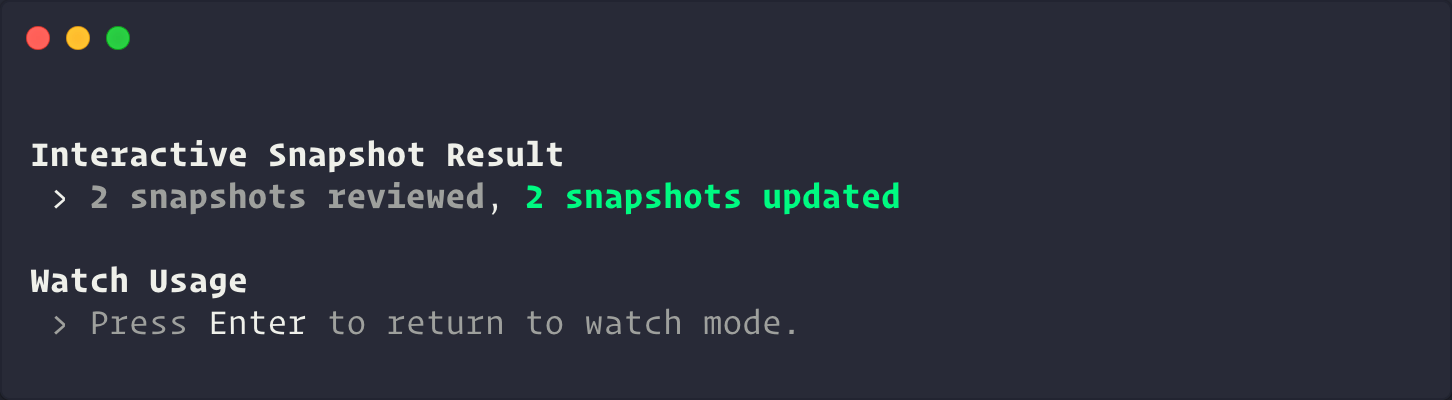
From here you can choose to update that snapshot or skip to the next:

Once you're finished, Jest will give you a summary before returning back to watch mode:
Inline Snapshots
Inline snapshots behave identically to external snapshots (.snap files), except the snapshot values are written automatically back into the source code. This means you can get the benefits of automatically generated snapshots without having to switch to an external file to make sure the correct value was written.
Пример:
First, you write a test, calling .toMatchInlineSnapshot() with no arguments:
it('renders correctly', () => {
  const tree = renderer
    .create(<Link page="https://example.com">Example Site</Link>)
    .toJSON();
  expect(tree).toMatchInlineSnapshot();
});
The next time you run Jest, tree will be evaluated, and a snapshot will be written as an argument to toMatchInlineSnapshot:
it('renders correctly', () => {
  const tree = renderer
    .create(<Link page="https://example.com">Example Site</Link>)
    .toJSON();
  expect(tree).toMatchInlineSnapshot(`
    <a
      className="normal"
      href="https://example.com"
      onMouseEnter={[Function]}
      onMouseLeave={[Function]}
    >
      Example Site
    </a>
  `);
});
That's all there is to it! You can even update the snapshots with --updateSnapshot or using the u key in --watch mode.
By default, Jest handles the writing of snapshots into your source code. However, if you're using prettier in your project, Jest will detect this and delegate the work to prettier instead (including honoring your configuration).
Property Matchers
Often there are fields in the object you want to snapshot which are generated (like IDs and Dates). If you try to snapshot these objects, they will force the snapshot to fail on every run:
it('will fail every time', () => {
  const user = {
    createdAt: new Date(),
    id: Math.floor(Math.random() * 20),
    name: 'LeBron James',
  };

  expect(user).toMatchSnapshot();
});

// Snapshot
exports[`will fail every time 1`] = `
{
  "createdAt": 2018-05-19T23:36:09.816Z,
  "id": 3,
  "name": "LeBron James",
}
`;
For these cases, Jest allows providing an asymmetric matcher for any property. These matchers are checked before the snapshot is written or tested, and then saved to the snapshot file instead of the received value:
it('will check the matchers and pass', () => {
  const user = {
    createdAt: new Date(),
    id: Math.floor(Math.random() * 20),
    name: 'LeBron James',
  };

  expect(user).toMatchSnapshot({
    createdAt: expect.any(Date),
    id: expect.any(Number),
  });
});

// Snapshot
exports[`will check the matchers and pass 1`] = `
{
  "createdAt": Any<Date>,
  "id": Any<Number>,
  "name": "LeBron James",
}
`;
Any given value that is not a matcher will be checked exactly and saved to the snapshot:
it('will check the values and pass', () => {
  const user = {
    createdAt: new Date(),
    name: 'Bond... James Bond',
  };

  expect(user).toMatchSnapshot({
    createdAt: expect.any(Date),
    name: 'Bond... James Bond',
  });
});

// Snapshot
exports[`will check the values and pass 1`] = `
{
  "createdAt": Any<Date>,
  "name": 'Bond... James Bond',
}
`;
If the case concerns a string not an object then you need to replace random part of that string on your own before testing the snapshot.
You can use for that e.g. replace() and regular expressions.
const randomNumber = Math.round(Math.random() * 100);
const stringWithRandomData = `<div id="${randomNumber}">Lorem ipsum</div>`;
const stringWithConstantData = stringWithRandomData.replace(/id="\d+"/, 123);
expect(stringWithConstantData).toMatchSnapshot();
Other ways this can be done is using the snapshot serializer or mocking the library responsible for generating the random part of the code you're snapshotting.
Best Practices
Snapshots are a fantastic tool for identifying unexpected interface changes within your application – whether that interface is an API response, UI, logs, or error messages. As with any testing strategy, there are some best-practices you should be aware of, and guidelines you should follow, in order to use them effectively.
1. Treat snapshots as code
Commit snapshots and review them as part of your regular code review process. This means treating snapshots as you would any other type of test or code in your project.
Ensure that your snapshots are readable by keeping them focused, short, and by using tools that enforce these stylistic conventions.
As mentioned previously, Jest uses pretty-format to make snapshots human-readable, but you may find it useful to introduce additional tools, like eslint-plugin-jest with its no-large-snapshots option, or snapshot-diff with its component snapshot comparison feature, to promote committing short, focused assertions.
The goal is to make it easy to review snapshots in pull requests, and fight against the habit of regenerating snapshots when test suites fail instead of examining the root causes of their failure.
2. Tests should be deterministic
Ваши тесты должны быть детерминированными. Running the same tests multiple times on a component that has not changed should produce the same results every time. Вы ответственны за убеждение в том, что сохраненные снимки не включают специфичные для платформы или любые другие недетерминированные данные.
For example, if you have a Clock component that uses Date.now(), the snapshot generated from this component will be different every time the test case is run. В этом случае мы можем создать мок для метода Date.now(), чтобы возвращать фиксированное значение при каждом запуске теста:
Date.now = jest.fn(() => 1_482_363_367_071);
Теперь при каждом запуске теста, Date.now() будет постоянно возвращать значение 1482363367071. Это приведет к тому, что для данного компонента будет создаваться один и тот же снимок независимо от того, когда тест запускается.
3. Use descriptive snapshot names
Always strive to use descriptive test and/or snapshot names for snapshots. The best names describe the expected snapshot content. This makes it easier for reviewers to verify the snapshots during review, and for anyone to know whether or not an outdated snapshot is the correct behavior before updating.
For example, compare:
exports[`<UserName /> should handle some test case`] = `null`;

exports[`<UserName /> should handle some other test case`] = `
<div>
  Alan Turing
</div>
`;
To:
exports[`<UserName /> should render null`] = `null`;

exports[`<UserName /> should render Alan Turing`] = `
<div>
  Alan Turing
</div>
`;
Since the latter describes exactly what's expected in the output, it's more clear to see when it's wrong:
exports[`<UserName /> should render null`] = `
<div>
  Alan Turing
</div>
`;

exports[`<UserName /> should render Alan Turing`] = `null`;
Часто задаваемые вопросы
Are snapshots written automatically on Continuous Integration (CI) systems?
No, as of Jest 20, snapshots in Jest are not automatically written when Jest is run in a CI system without explicitly passing --updateSnapshot. Ожидается, что снимки являются обязательной частью теста, выполняемого на CI, следовательно, если они отсутствуют, тест не должен проходить. Рекомендуется всегда включать снимки в коммит вместе с тестами и хранить в системе контроля версий.
Нужно ли коммитить файлы со снимками?
Yes, all snapshot files should be committed alongside the modules they are covering and their tests. They should be considered part of a test, similar to the value of any other assertion in Jest. In fact, snapshots represent the state of the source modules at any given point in time. In this way, when the source modules are modified, Jest can tell what changed from the previous version. It can also provide a lot of additional context during code review in which reviewers can study your changes better.
Снимки работают только в тестах с React-компонентами?
Компоненты React и React Native – хорошие примеры того, где можно применять тесты со снимками. Однако, снимки могут содержать любые сериализуемые данные, и их всегда следует использовать, если цель теста – проверка корректности вывода. В репозитории Jest есть множество примеров тестирования вывода Jest, встроенной в него библиотеки assert'ов, а также логирования событий в различных частях кодовой базы Jest. See an example of snapshotting CLI output in the Jest repo.
What's the difference between snapshot testing and visual regression testing?
Snapshot testing and visual regression testing are two distinct ways of testing UIs, and they serve different purposes. Visual regression testing tools take screenshots of web pages and compare the resulting images pixel by pixel. With Snapshot testing values are serialized, stored within text files, and compared using a diff algorithm. There are different trade-offs to consider and we listed the reasons why snapshot testing was built in the Jest blog.
Does snapshot testing replace unit testing?
Snapshot testing is only one of more than 20 assertions that ship with Jest. The aim of snapshot testing is not to replace existing unit tests, but to provide additional value and make testing painless. In some scenarios, snapshot testing can potentially remove the need for unit testing for a particular set of functionalities (e.g. React components), but they can work together as well.
What is the performance of snapshot testing regarding speed and size of the generated files?
Jest has been rewritten with performance in mind, and snapshot testing is not an exception. Since snapshots are stored within text files, this way of testing is fast and reliable. Jest generates a new file for each test file that invokes the toMatchSnapshot matcher. The size of the snapshots is pretty small: For reference, the size of all snapshot files in the Jest codebase itself is less than 300 KB.
How do I resolve conflicts within snapshot files?
Snapshot files must always represent the current state of the modules they are covering. Таким образом, если вы объединяете две ветки и сталкиваетесь с конфликтом в снимках файлов, вы можете разрешить конфликт вручную или обновить файл снимка, запустив Jest и просмотрев результат.
Is it possible to apply test-driven development principles with snapshot testing?
Although it is possible to write snapshot files manually, that is usually not approachable. Снимки скорее помогают определить, изменен ли код модулей, покрытых тестами, чем подсказывают как его проектировать.
Работает ли покрытие тестами с тестированием снимков?
Да, а как и с любым другим тестом.