Тестування з допомогою знімків
Тестування з використанням знімків - це дуже корисний інструмент, коли ви хочете бути впевнені, що у вашому UI не відбулося несподіваних змін.
Типовий тестовий сценарій для тестування знімками виконує рендер UI компонента, робить знімок файлової системи та порівнює його з файлом знімку, який зберігається разом з тестом. Тест викличе помилку, якщо два зображення не збігаються: відбулась неочікувана зміна або знімок повинен бути оновлений відповідно до нової версії UI компонента.
Тестування знімками з Jest
Аналогічний підіхід може бути використано, коли заходить мова про тестування React компонентів. Instead of rendering the graphical UI, which would require building the entire app, you can use a test renderer to quickly generate a serializable value for your React component. Consider this example test for a Link component:
import {render} from '@testing-library/react';
import Link from '../Link';

it('renders correctly', () => {
  const {container} = render(
    <Link page="http://www.facebook.com">Facebook</Link>,
  );
  expect(container.firstChild).toMatchSnapshot();
});
The first time this test is run, Jest creates a snapshot file that looks like this:
exports[`renders correctly 1`] = `
<a
  aria-label="normal"
  class="normal"
  href="http://www.facebook.com"
>
  Facebook
</a>
`;
Знімок повинен бути доданий до системи конролю версій разом зі змінами коду, що дозволить переглянути його в процесі code review. Jest uses pretty-format to make snapshots human-readable during code review. Під час наступних запусків тесту, Jest порівняє результат роботи компонента зі збереженим знімком. Якщо вони співпадуть, тест пройде. If they don't match, either the test runner found a bug in your code (in the <Link> component in this case) that should be fixed, or the implementation has changed and the snapshot needs to be updated.
The snapshot is directly scoped to the data you render – in our example the <Link> component with page prop passed to it. This implies that even if any other file has missing props (say, App.js) in the <Link> component, it will still pass the test as the test doesn't know the usage of <Link> component and it's scoped only to the Link.js. Also, rendering the same component with different props in other snapshot tests will not affect the first one, as the tests don't know about each other.
More information on how snapshot testing works and why we built it can be found on the release blog post. We recommend reading this blog post to get a good sense of when you should use snapshot testing. We also recommend watching this egghead video on Snapshot Testing with Jest.
Оновлення знімків
Дуже просто помітити, коли тест з використанням знімків падає після того, як з’явилася помилка в коді. Коли таке трапляється, просто виправте помилку і переконайтеся, що ваші тести знову проходять успішно. Тепер давайте поговоримо про випадок, коли тест зі знімком падає внаслідок навмисної зміни коду.
Така ситуація може виникнути, якщо ми навмисно змінимо адресу, на яку вказує компонент Link з нашого прикладу.
// Updated test case with a Link to a different address
it('renders correctly', () => {
  const {container} = render(
    <Link page="http://www.instagram.com">Instagram</Link>,
  );
  expect(container.firstChild).toMatchSnapshot();
});
В цьому випадку Jest видасть наступний вивід:
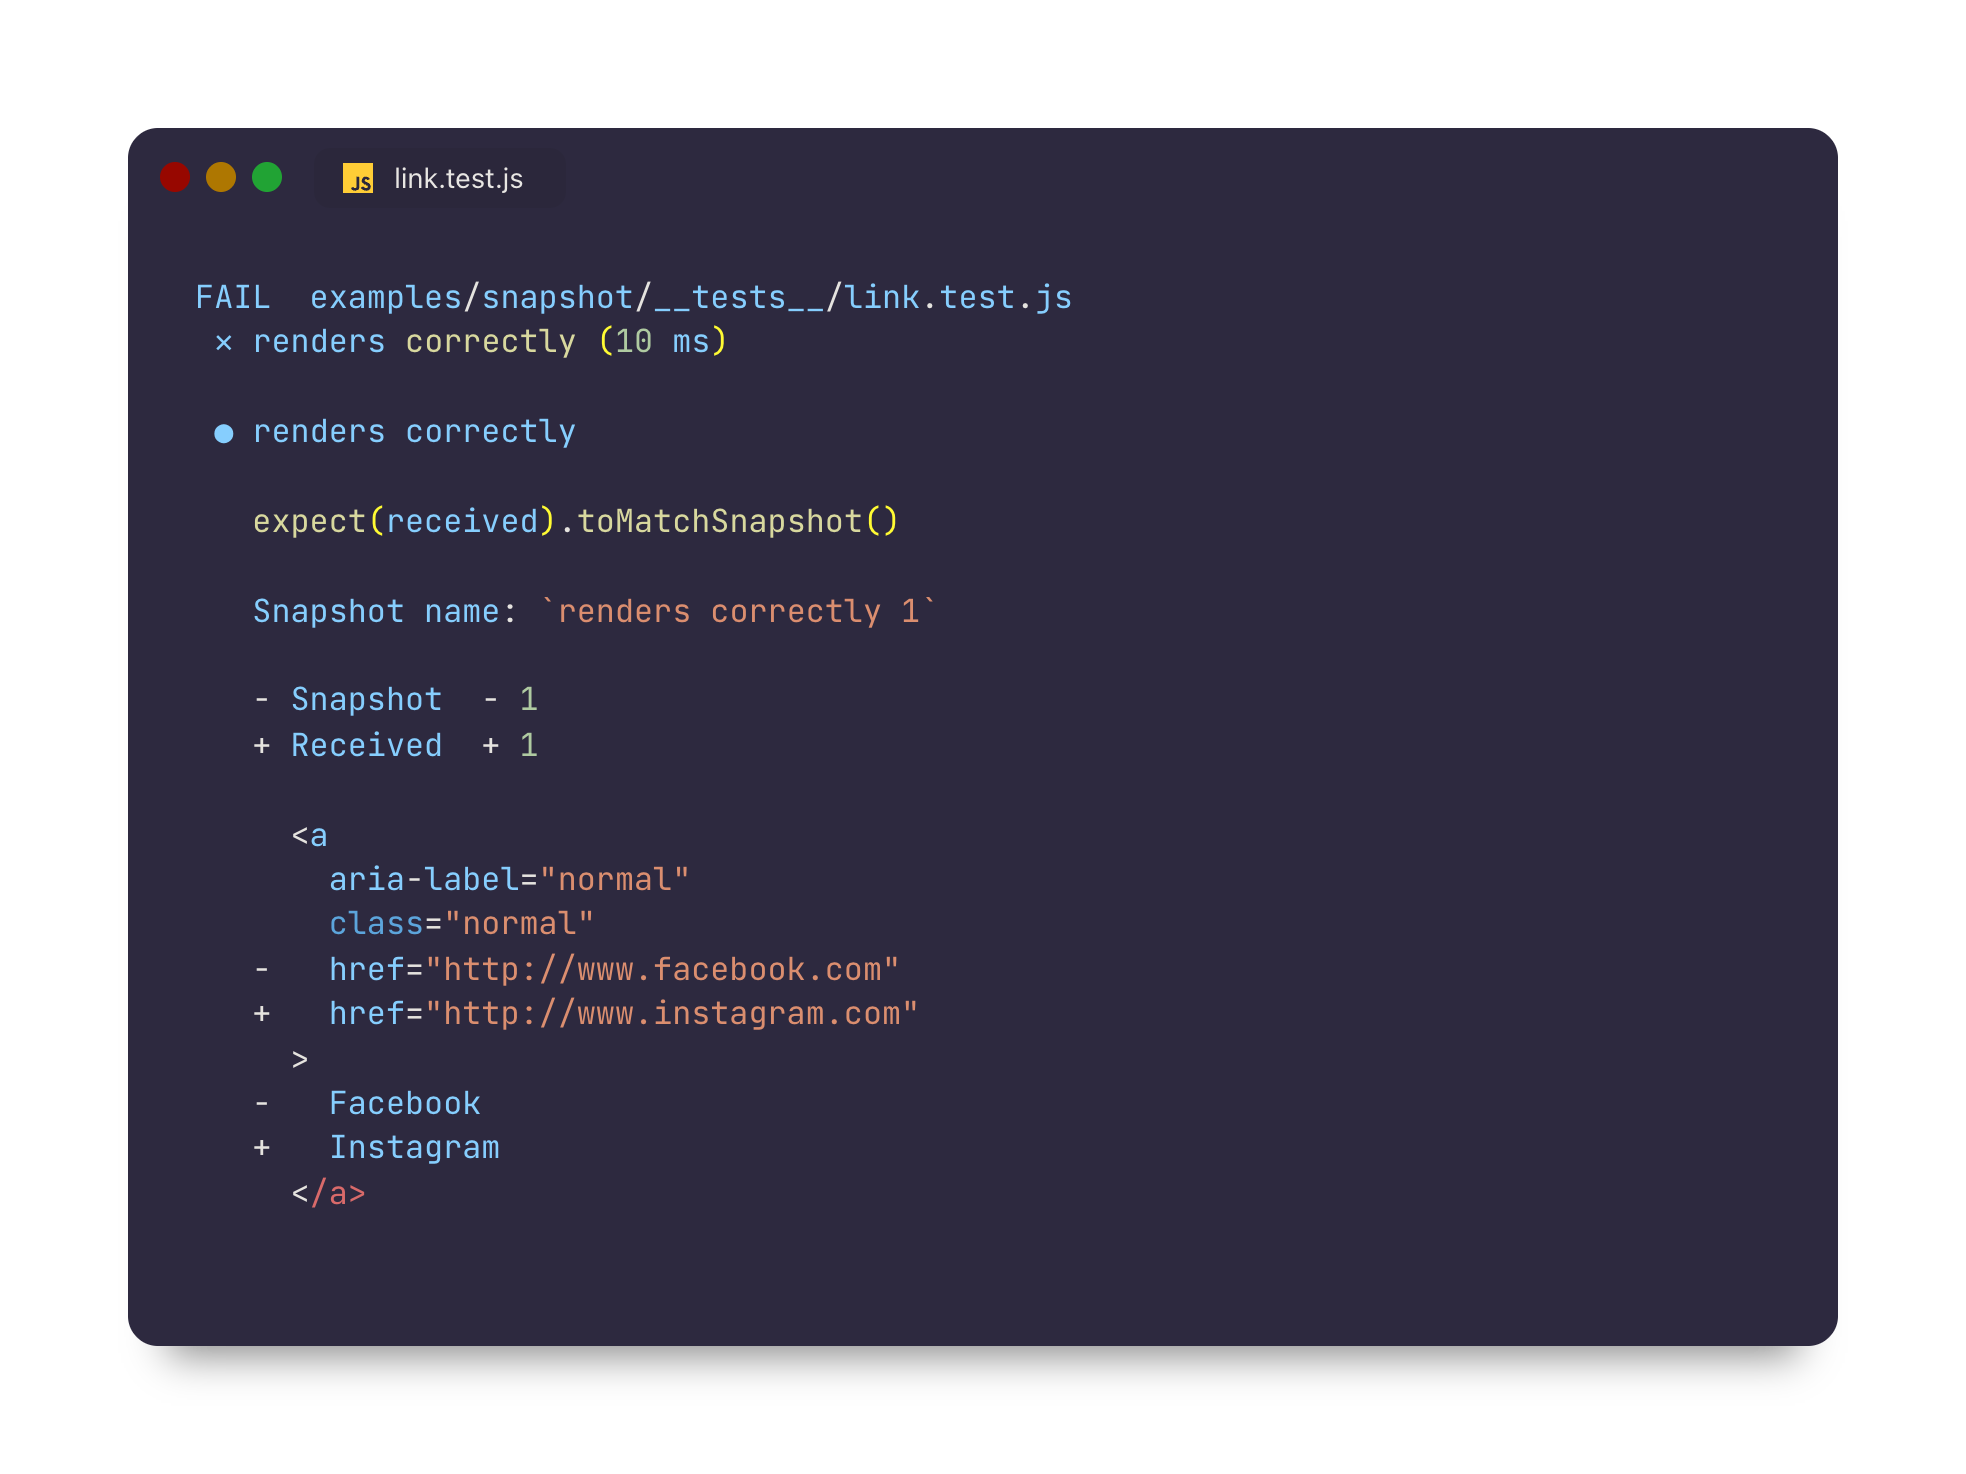
Оскільки ми щойно оновили наш компонент, щоб він вказував на іншу адресу, логічно очікувати зміну знімка цього компонента. Наш тест зі знімком падає, оскільки знімок для оновленого компонента більше не співпадає зі збереженим знімком для цього теста.
To resolve this, we will need to update our snapshot artifacts. You can run Jest with a flag that will tell it to re-generate snapshots:
jest --updateSnapshot
Просто прийміть зміни запустивши команду вище. You may also use the equivalent single-character -u flag to re-generate snapshots if you prefer. Це перегенерує знімки для всіх тестів, які впали через неспівпадіння знімків. Якби у нас були тести зі знімками, які падали через помилку в коді, нам варто було б виправити ці проблеми до перегенерації знімків, щоб запобігти створенню знімків для неправильної поведінки.
If you'd like to limit which snapshot test cases get re-generated, you can pass an additional --testNamePattern flag to re-record snapshots only for those tests that match the pattern.
You can try out this functionality by cloning the snapshot example, modifying the Link component, and running Jest.
Інтерактивний режим знімка
Failed snapshots can also be updated interactively in watch mode:
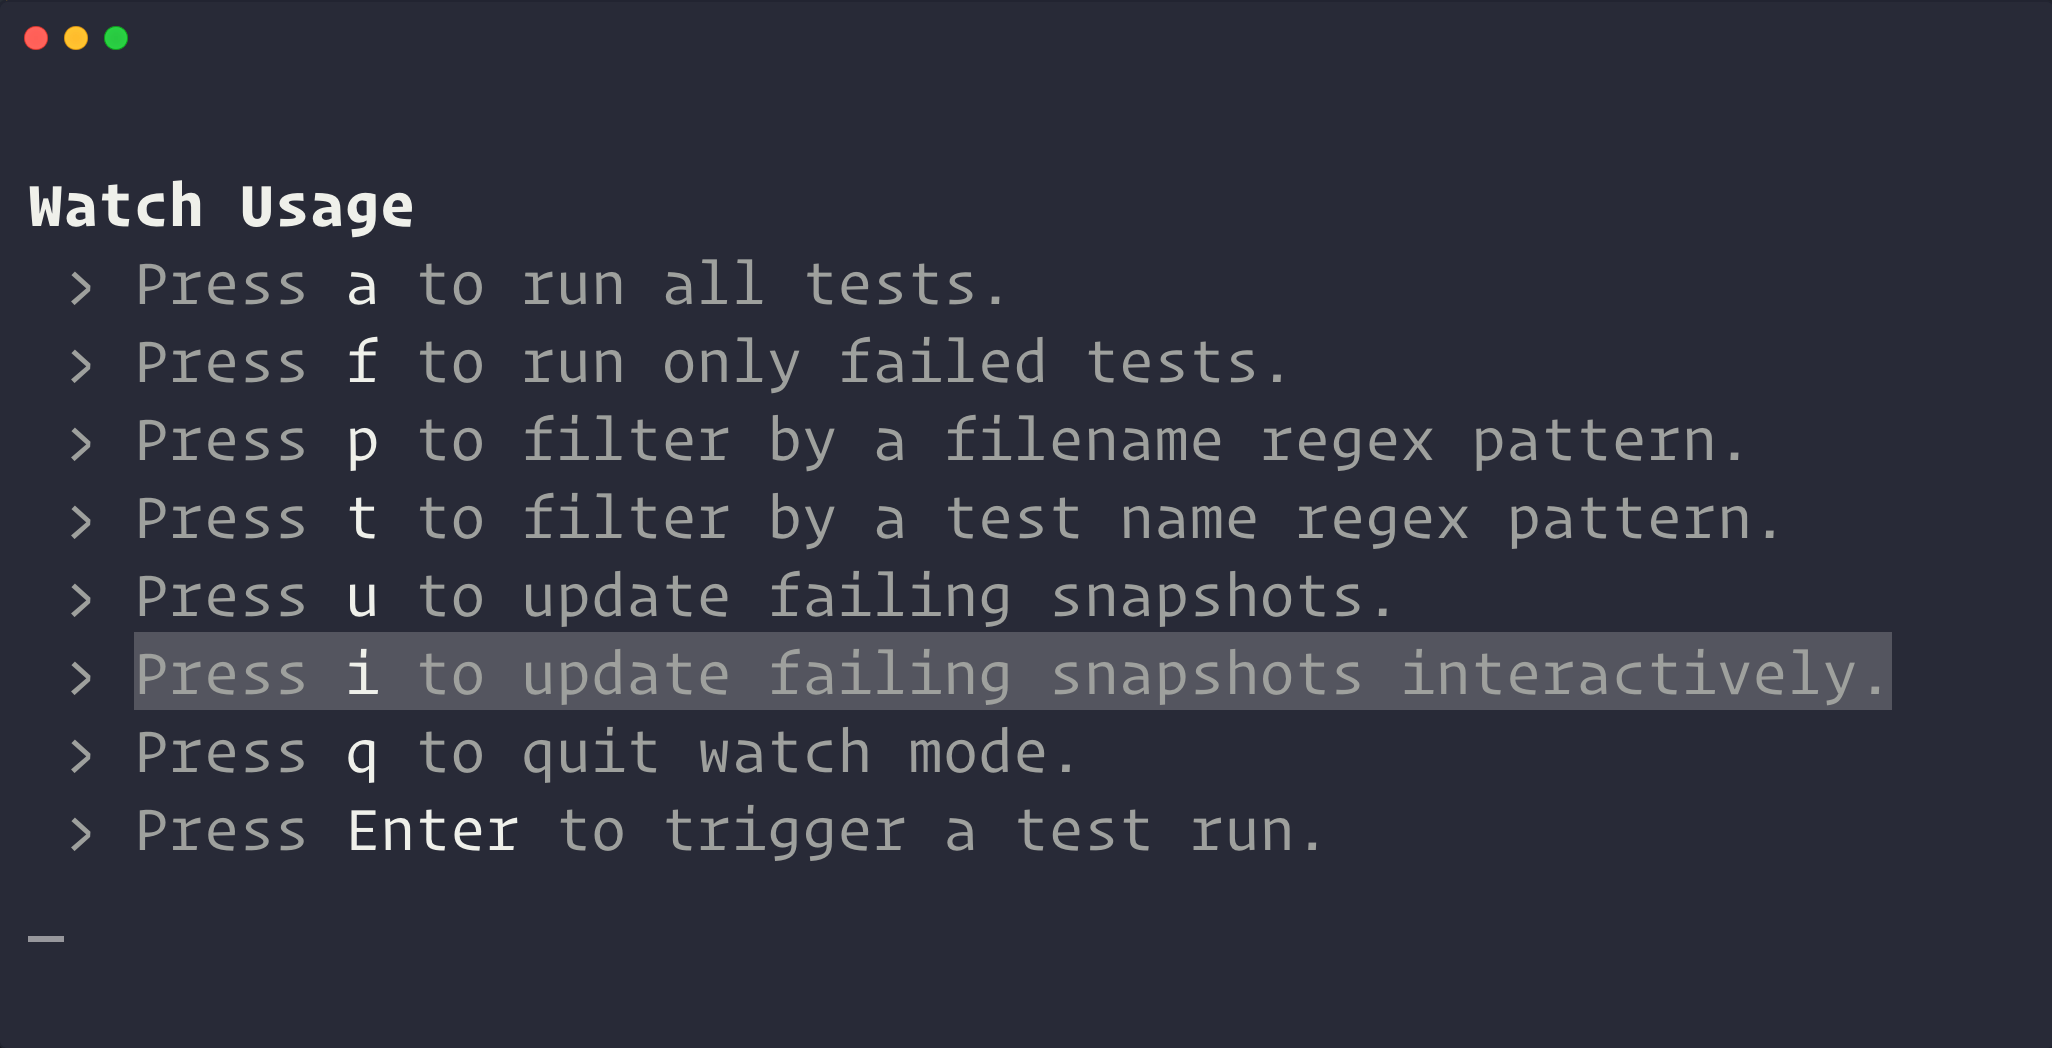
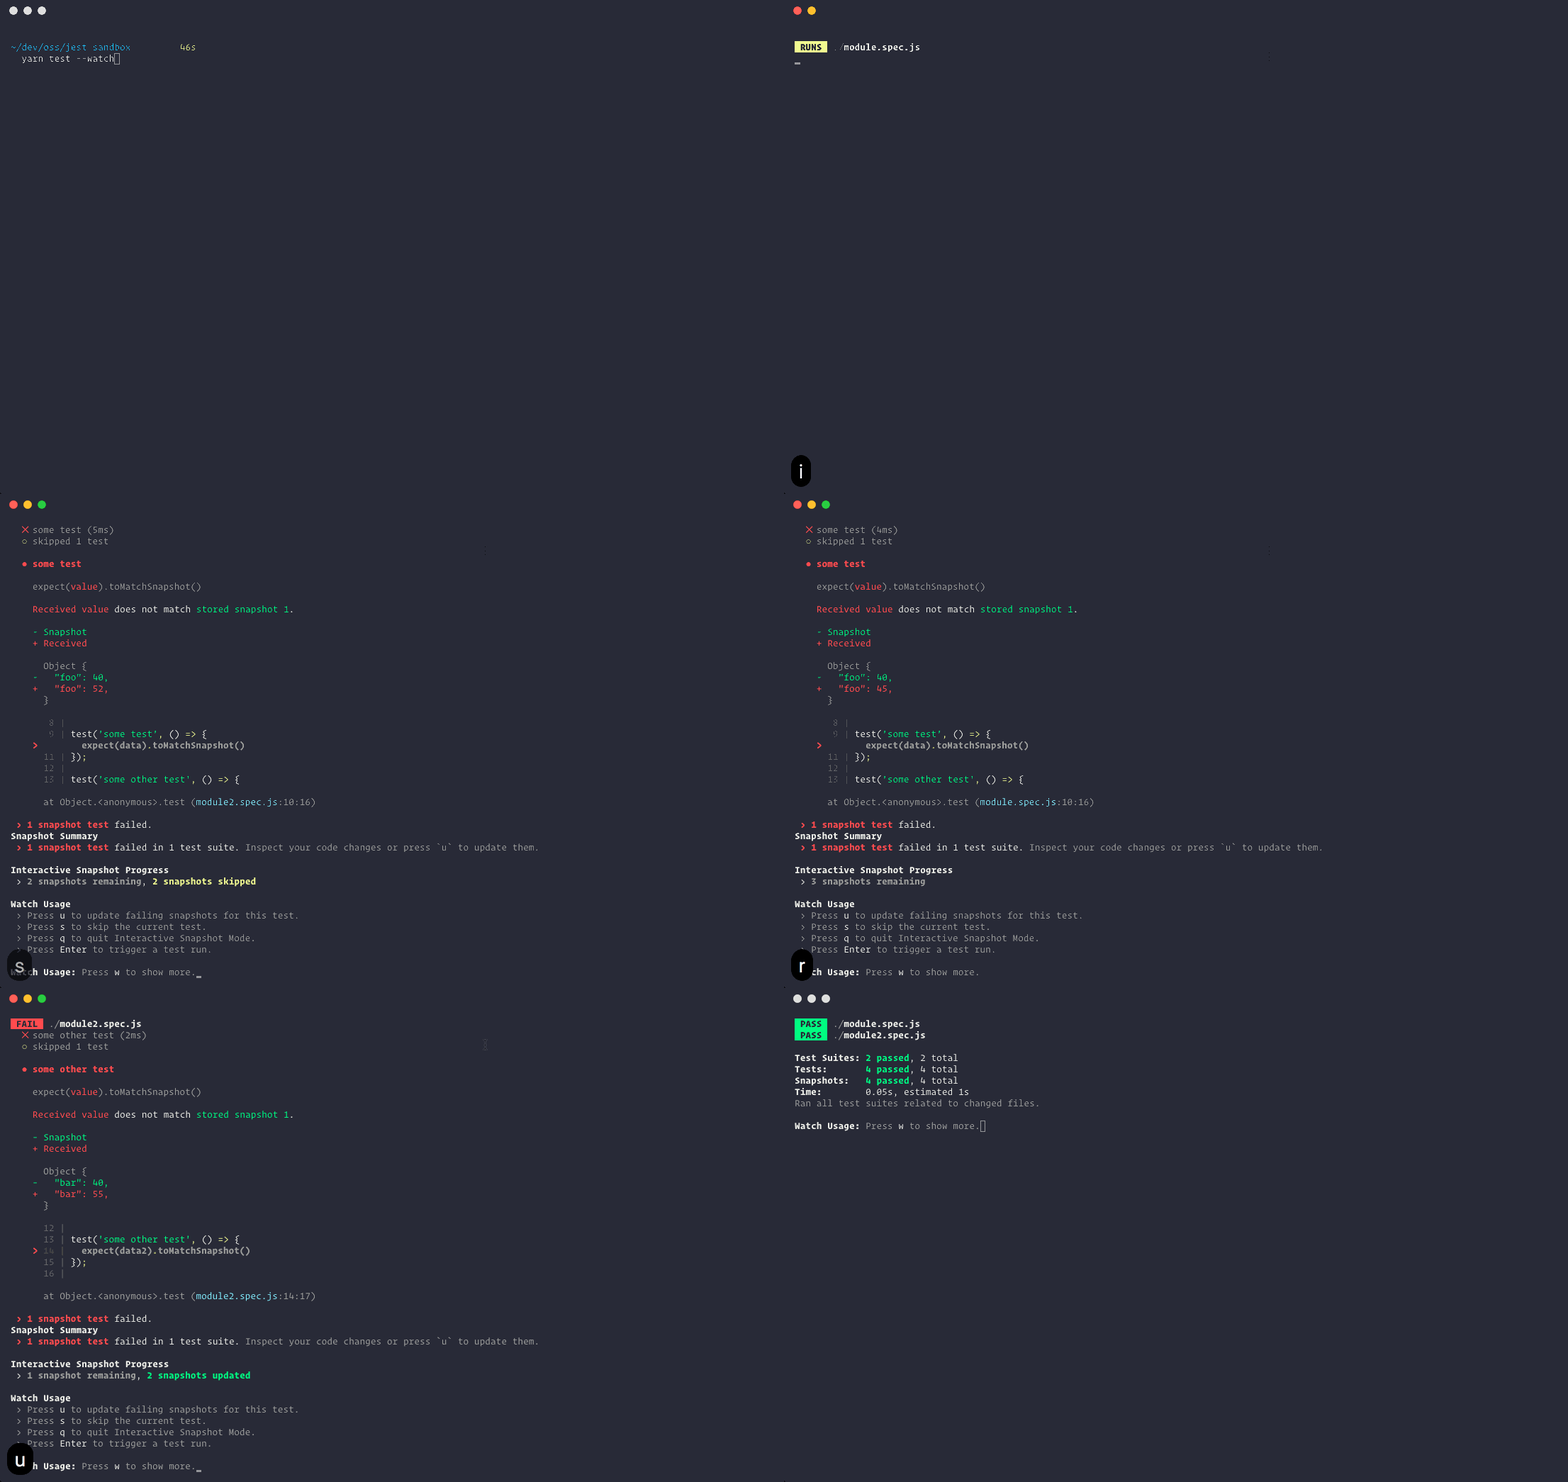
Once you enter Interactive Snapshot Mode, Jest will step you through the failed snapshots one test at a time and give you the opportunity to review the failed output.
From here you can choose to update that snapshot or skip to the next:
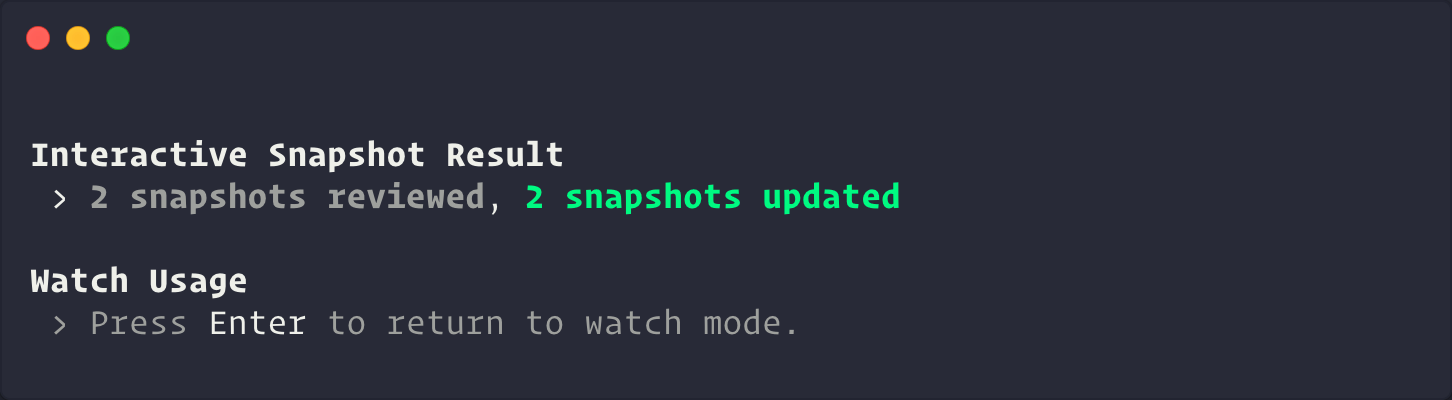
Once you're finished, Jest will give you a summary before returning back to watch mode:
Вбудовані знімки
Inline snapshots behave identically to external snapshots (.snap files), except the snapshot values are written automatically back into the source code. This means you can get the benefits of automatically generated snapshots without having to switch to an external file to make sure the correct value was written.
Example:
First, you write a test, calling .toMatchInlineSnapshot() with no arguments:
it('renders correctly', () => {
  const {container} = render(
    <Link page="https://example.com">Example Site</Link>,
  );
  expect(container.firstChild).toMatchInlineSnapshot();
});
The next time you run Jest, tree will be evaluated, and a snapshot will be written as an argument to toMatchInlineSnapshot:
it('renders correctly', () => {
  const {container} = render(
    <Link page="https://example.com">Example Site</Link>,
  );
  expect(container.firstChild).toMatchInlineSnapshot(`
    <a
      aria-label="normal"
      className="normal"
      href="https://example.com"
    >
      Example Site
    </a>
  `);
});
That's all there is to it! You can even update the snapshots with --updateSnapshot or using the u key in --watch mode.
By default, Jest handles the writing of snapshots into your source code. However, if you're using prettier in your project, Jest will detect this and delegate the work to prettier instead (including honoring your configuration).
Матчери властивостей
Often there are fields in the object you want to snapshot which are generated (like IDs and Dates). If you try to snapshot these objects, they will force the snapshot to fail on every run:
it('will fail every time', () => {
  const user = {
    createdAt: new Date(),
    id: Math.floor(Math.random() * 20),
    name: 'LeBron James',
  };

  expect(user).toMatchSnapshot();
});

// Snapshot
exports[`will fail every time 1`] = `
{
  "createdAt": 2018-05-19T23:36:09.816Z,
  "id": 3,
  "name": "LeBron James",
}
`;
For these cases, Jest allows providing an asymmetric matcher for any property. These matchers are checked before the snapshot is written or tested, and then saved to the snapshot file instead of the received value:
it('will check the matchers and pass', () => {
  const user = {
    createdAt: new Date(),
    id: Math.floor(Math.random() * 20),
    name: 'LeBron James',
  };

  expect(user).toMatchSnapshot({
    createdAt: expect.any(Date),
    id: expect.any(Number),
  });
});

// Snapshot
exports[`will check the matchers and pass 1`] = `
{
  "createdAt": Any<Date>,
  "id": Any<Number>,
  "name": "LeBron James",
}
`;
Any given value that is not a matcher will be checked exactly and saved to the snapshot:
it('will check the values and pass', () => {
  const user = {
    createdAt: new Date(),
    name: 'Bond... James Bond',
  };

  expect(user).toMatchSnapshot({
    createdAt: expect.any(Date),
    name: 'Bond... James Bond',
  });
});

// Snapshot
exports[`will check the values and pass 1`] = `
{
  "createdAt": Any<Date>,
  "name": 'Bond... James Bond',
}
`;
If the case concerns a string not an object then you need to replace random part of that string on your own before testing the snapshot.
You can use for that e.g. replace() and regular expressions.
const randomNumber = Math.round(Math.random() * 100);
const stringWithRandomData = `<div id="${randomNumber}">Lorem ipsum</div>`;
const stringWithConstantData = stringWithRandomData.replace(/id="\d+"/, 123);
expect(stringWithConstantData).toMatchSnapshot();
Other ways this can be done is using the snapshot serializer or mocking the library responsible for generating the random part of the code you're snapshotting.
Методичні рекомендації
Snapshots are a fantastic tool for identifying unexpected interface changes within your application – whether that interface is an API response, UI, logs, or error messages. As with any testing strategy, there are some best-practices you should be aware of, and guidelines you should follow, in order to use them effectively.
1. Поводьтесь зі знімками, як з кодом
Commit snapshots and review them as part of your regular code review process. This means treating snapshots as you would any other type of test or code in your project.
Ensure that your snapshots are readable by keeping them focused, short, and by using tools that enforce these stylistic conventions.
As mentioned previously, Jest uses pretty-format to make snapshots human-readable, but you may find it useful to introduce additional tools, like eslint-plugin-jest with its no-large-snapshots option, or snapshot-diff with its component snapshot comparison feature, to promote committing short, focused assertions.
The goal is to make it easy to review snapshots in pull requests, and fight against the habit of regenerating snapshots when test suites fail instead of examining the root causes of their failure.
2. Тести повинні бути детерміновані
Ваші тести повинні бути детерміновані. Running the same tests multiple times on a component that has not changed should produce the same results every time. Ви відповідальні за те, щоб ваші знімки не включали в себе специфічні для конкретної платформи або інші недетерміновані дані.
For example, if you have a Clock component that uses Date.now(), the snapshot generated from this component will be different every time the test case is run. In this case we can mock the Date.now() method to return a consistent value every time the test is run:
Date.now = jest.fn(() => 1_482_363_367_071);
Now, every time the snapshot test case runs, Date.now() will return 1482363367071 consistently. Це призведе до того, що знімок буде однаковим завжди, незалежно від того, коли запущений тест.
3. Використовуйте описові назви знімків
Always strive to use descriptive test and/or snapshot names for snapshots. The best names describe the expected snapshot content. This makes it easier for reviewers to verify the snapshots during review, and for anyone to know whether or not an outdated snapshot is the correct behavior before updating.
For example, compare:
exports[`<UserName /> should handle some test case`] = `null`;

exports[`<UserName /> should handle some other test case`] = `
<div>
  Alan Turing
</div>
`;
To:
exports[`<UserName /> should render null`] = `null`;

exports[`<UserName /> should render Alan Turing`] = `
<div>
  Alan Turing
</div>
`;
Since the latter describes exactly what's expected in the output, it's more clear to see when it's wrong:
exports[`<UserName /> should render null`] = `
<div>
  Alan Turing
</div>
`;

exports[`<UserName /> should render Alan Turing`] = `null`;
Часті запитання
Чи створюються знімки автоматично в системах безперервної інтеграції (CI)?
No, as of Jest 20, snapshots in Jest are not automatically written when Jest is run in a CI system without explicitly passing --updateSnapshot. Очікується, що всі знімки — це частина коду, який виконується на CI і тому, хоча тести з новими знімки автоматично проходять, вони не повинні проходити на CI. Ми рекомендуємо завжди додавати всі знімки в систему контролю версій.
Чи потрібно комітити снепшот файли?
Так, усі файли зі знімками потрібно додавати в систему контролю версій разом із модулями, які вони покривають та їхніми тестами. They should be considered part of a test, similar to the value of any other assertion in Jest. Знімки відображають стан модулів на певний час. Таким чином, коли модулі змінюються, Jest може сказати, які зміни відбулися у порівнянні з попередньою версією. Вони також можуть надати додатковий контекст для code review, завдяки чому рев’ювери можуть краще зрозуміти внесені зміни.
Чи дійсно тестування знімками працює тільки для React компонентів?
React and React Native components are a good use case for snapshot testing. Однак, знімки можуть містити будь-яке серіалізоване значення і можуть використовуватись будь-де, де ціллю є тестування того чи вихідні значення правильні. В репозиторії Jest є багато прикладів тестування виводу самого Jest, виводу бібліотеки стверджень Jest і довгих повідомлень з різних частин кодової бази Jest. See an example of snapshotting CLI output in the Jest repo.
Яка різниця між тестуванням знімками та візуальним регресивним тестуванням?
Тестування знімками і візуальне регресивне тестування — це два різні способи тестування UI, які слугують різним цілям. Інструменти візуального регресивного тестування роблять знімки веб сторінок і порівнюють результат піксель за пікселем. With Snapshot testing values are serialized, stored within text files, and compared using a diff algorithm. There are different trade-offs to consider and we listed the reasons why snapshot testing was built in the Jest blog.
Чи замінює тестування знімками юніт тести?
Тестування знімками — це лише одне з більш ніж 20 тверджень, які надає Jest. The aim of snapshot testing is not to replace existing unit tests, but to provide additional value and make testing painless. В деяких сценаріях тестування знімками потенційно може прибрати необхідність юніт тестування для конкретного набору функціональності (анприклад React компонентів), але вони можуть чудово працювати разом.
Яка продуктивність тестування знімками стосовно швидкості і розміру згенерованих файлів?
Jest було переписано з акцентом на швидкодію і тестування знімками не виключення. Оскільки знімки зберігаються в текстових файлах, цей спосіб тестування швидкий і надійний. Jest generates a new file for each test file that invokes the toMatchSnapshot matcher. The size of the snapshots is pretty small: For reference, the size of all snapshot files in the Jest codebase itself is less than 300 KB.
Як вирішувати конфлікти в файлах зі знімками?
Файли зі знімками повинні завжди представляти поточний стан модулів, які вони покривають. Therefore, if you are merging two branches and encounter a conflict in the snapshot files, you can either resolve the conflict manually or update the snapshot file by running Jest and inspecting the result.
Чи можна застосовувати принципи розробки через тестування з тестуванням знімками?
Хоча і існує можливість писати файли знімків вручну, це все ж недосяжно. Snapshots help to figure out whether the output of the modules covered by tests is changed, rather than giving guidance to design the code in the first place.
Чи працює перевірка покриття коду тестами разом з тестуванням знімками?
Yes, as well as with any other test.